In this post, I will be showing you how to deploy Solace’s PubSub+ event broker on an OpenShift cluster. In an earlier post, I showed how to deploy an OpenShift Enterprise cluster in AWS so this post is a follow up to that.
There are different setups available for deploying PubSub+. In this post, we will focus on a single node broker as opposed to a multi-node high availability broker.
As of right now, you need to make sure that your OpenShift project has root privileges to be able to run publicly available Docker image of our PubSub+ broker. A new version will be provided soon which won’t require you to provide your project with root access. Please note that this is not best practice and is for demo purpose only.
If you recall from our AWS OpenShift setup, we have 1 ansible/config host and 3 master hosts along with several nodes. The only way to access master hosts is to first ssh into the ansible host and then ssh into the master host from there. Keep this in mind.
To give your project root access, follow these steps:
1. Copy your AWS access key from your local machine to your ansible host because that’s the only host you can ssh into directly.
scp -i "himanshu-tokyo.pem" himanshu-tokyo.pem ec2-user@ec2-54-199-166-3.ap-northeast-1.compute.amazonaws.com:/home/ec2-user2. ssh into your ansible host
ssh -i "himanshu-tokyo.pem" ec2-user@ec2-54-199-166-3.ap-northeast-1.compute.amazonaws.com3. From there, ssh into one of your master hosts (doesn’t matter which one)
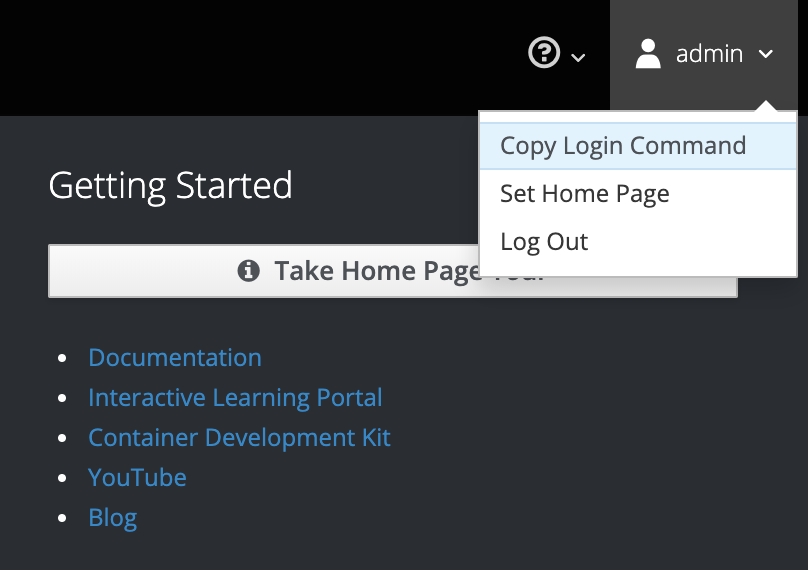
ssh -i "himanshu-tokyo.pem" ec2-user@10.0.35.1264. Go to your OpenShift UI and get the login command by clicking on your userid on top right and selecting Copy login command.
Run that command on the master host:
[ec2-user@ip-10-0-35-126 ~]$ <oc_login_command_that_was_copied>

You don't have any projects. You can try to create a new project, by running

    oc new-project <projectname>

Welcome! See 'oc help' to get started.
As you can see, we don’t have a project yet so we need to create one.
5. Create a new project called solace by running this command:
ec2-user@ip-10-0-35-126 ~]$ oc new-project solace

You can add applications to this project with the 'new-app' command. For example, try:

    oc new-app centos/ruby-25-centos7~https://github.com/sclorg/ruby-ex.git

to build a new example application in Ruby.
6. Run the following command to enter that project:
[ec2-user@ip-10-0-35-126 ~]$ oc projects
You have one project on this server: "solace".
7. Now run these commands to give your project root access:
[ec2-user@ip-10-0-35-126 ~]$ sudo oc adm policy add-cluster-role-to-user cluster-admin admin --as=system:admin
cluster role "cluster-admin" added: "admin"

[ec2-user@ip-10-0-35-126 ~]$ sudo oc adm policy add-scc-to-user privileged system:serviceaccount:solace:default
scc "privileged" added to: ["system:serviceaccount:solace:default"]

[ec2-user@ip-10-0-35-126 ~]$ sudo oc adm policy add-scc-to-user anyuid system:serviceaccount:solace:default
scc "anyuid" added to: ["system:serviceaccount:solace:default"]
[ec2-user@ip-10-0-35-126 ~]$
Note that ‘solace’ is our project name here. If your project is named something else, replace ‘solace’ with your project name.
Deploying PubSub+ broker
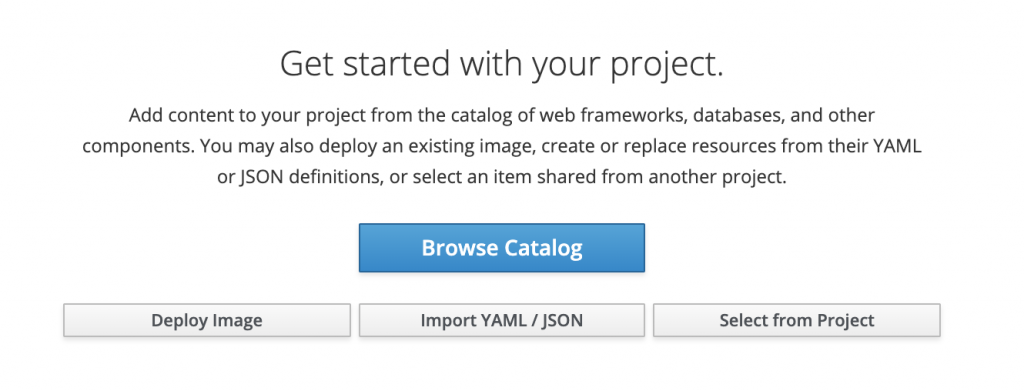
Now that we have our project setup, we can go ahead and deploy the broker. You can find several predefined templates here. We will try to deploy single node broker first using this template.
Go to OpenShift UI, select your project and then choose Import yaml/json option.
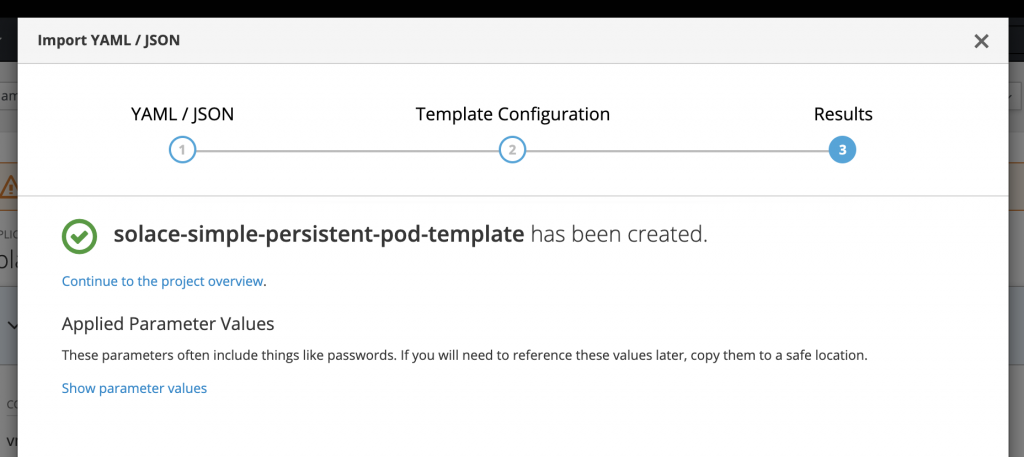
Paste the content of the template here and click Create. You may want to save this template to use later so check the checkbox Save template and click Continue.
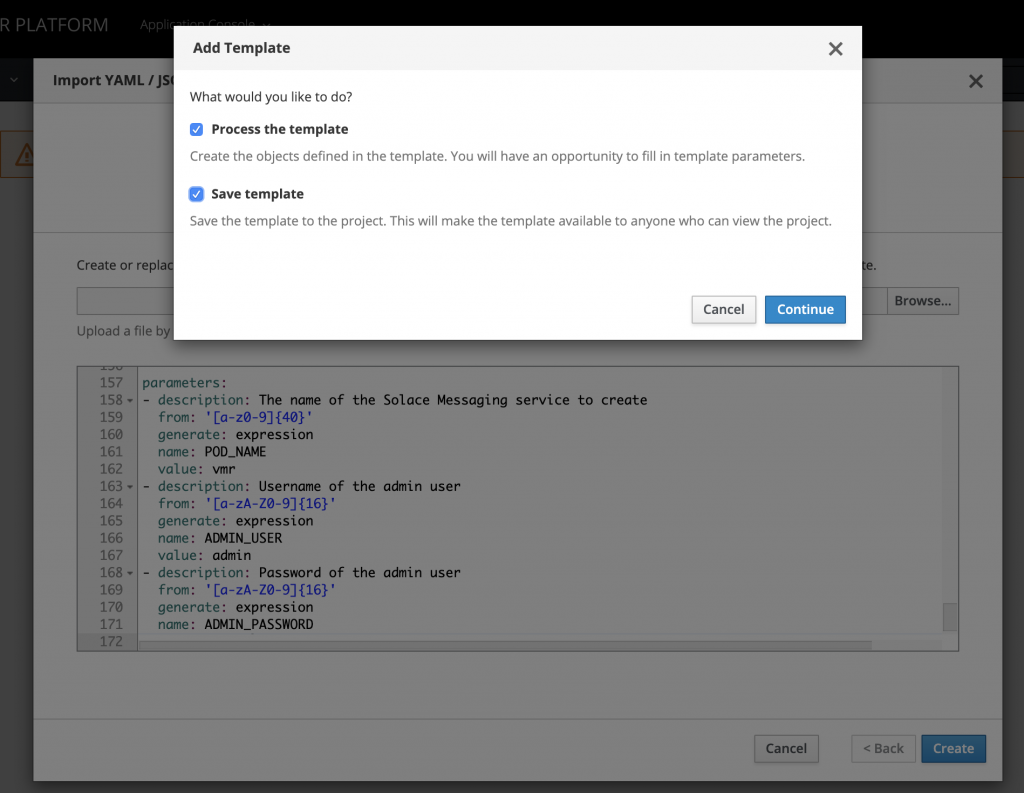
You can change some settings regarding pod name and username/password or you can keep the default values and click Create. Finally, click on Close and wait a few minutes for pod to come up.
Click on the pod to get more details about it.
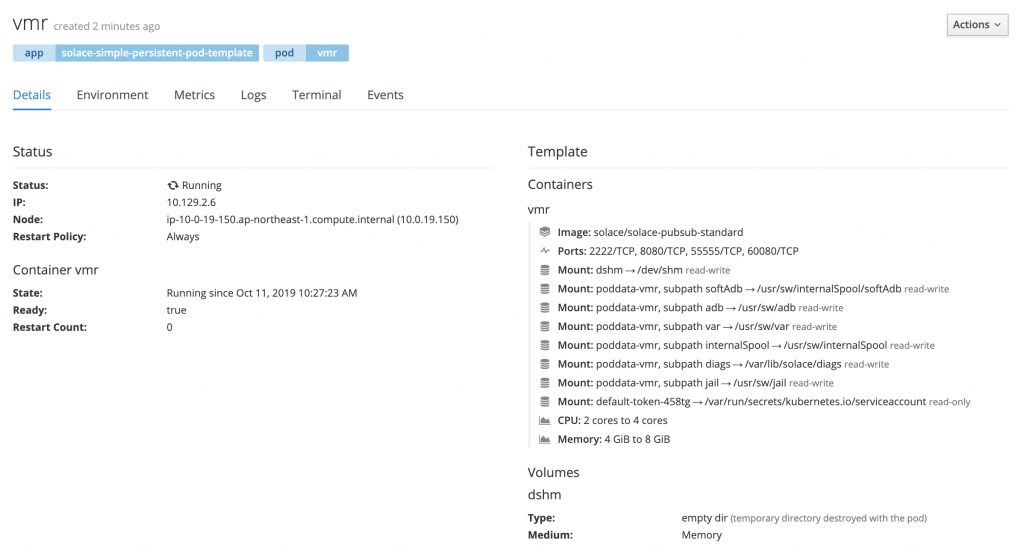
Now, we will ssh into the broker.
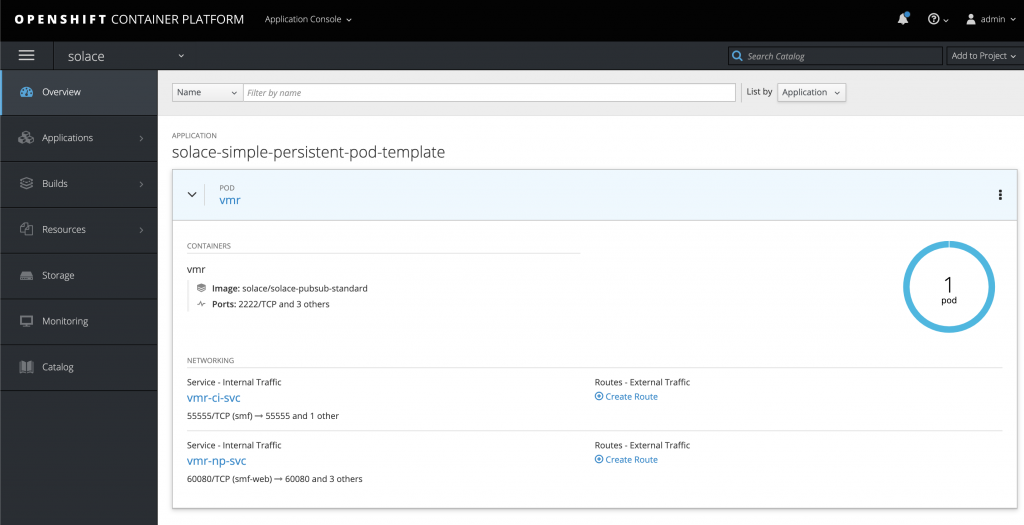
Go back to your OpenShift UI and click on Overview tab. There, you will see that you have two services running called vmr-ci-svc and vmr-np-svc.
Click on vmr-np-svc. Here, you will see some more details about this service, especially port mappings. Get the Route/Node port for 2222/TCP (ssh-alternate). In my case, that is 30267.
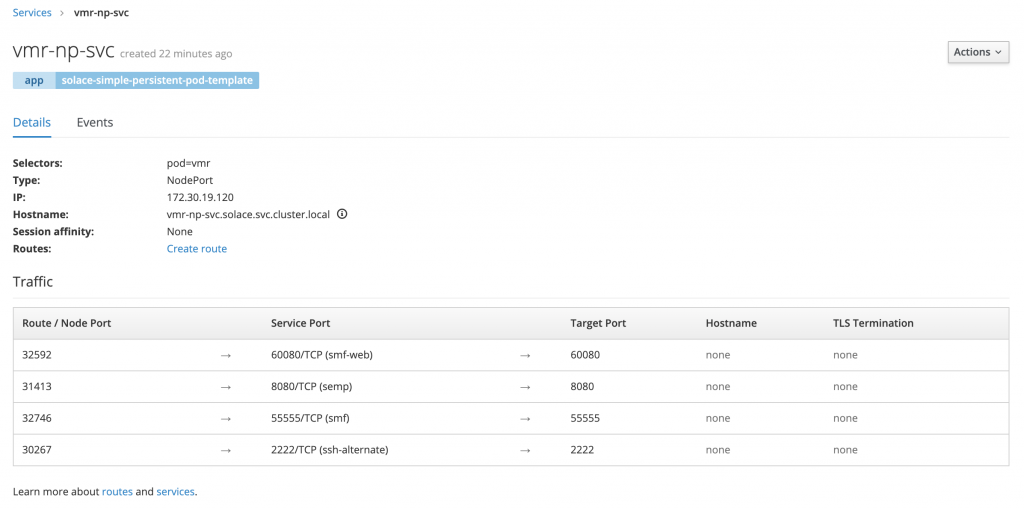
Get the ip address of one of your master hosts. SSH into your ansible server (since you have to go through this server if you followed OpenShift’s AWS deployment) and then run this ssh command which uses the 30267 port:
/ SSH into your ansible host first
(base) himanshugupta:Downloads hgupta$ ssh -i "himanshu-tokyo.pem" ec2-user@ec2-54-199-166-3.ap-northeast-1.compute.amazonaws.com

/ Ssh into PubSub+ broker
[ec2-user@ip-10-0-139-89 ~]$ ssh -p 30267 admin@10.0.35.126
Are you sure you want to continue connecting (yes/no)? yes
Solace PubSub+ Standard
Password:

Solace PubSub+ Standard Version 9.3.0.22

Operating Mode: Message Routing Node

vmr>
Note, that if you used the default settings, your username/password are both admin.
You can run usual Solace CLI commands here:
vmr(show)> show service

Msg-Backbone:       Enabled
  VRF:              management
  SMF:              Enabled
    Web-Transport:  Enabled
  REST Incoming:    Enabled
  REST Outgoing:    Enabled
  MQTT:             Enabled
  AMQP:             Enabled
  Health-check:     Enabled
  Mate-link:        Enabled
  Redundancy:       Enabled

Max Incoming Connections:       100
  Service SMF:                  100
  Service Web-Transport:        100
  Service REST:                 100
  Service MQTT:                 100
  Service AMQP:                 100
Max Outgoing Connections:
  Service REST:                 100
Max SSL Connections:            100
So this is how you deploy a Solace’s single node PubSub+ broker on OpenShift Enterprise. One restriction of deploying into OpenShift cluster that was created using AWS Quick Start template is that there are some security restrictions which don’t allow you to access Solace’s shiny WebUI. I am still trying to figure out how to modify the security settings to get that to work.